
Star Wars

Materials


Open
a new document in PSP 640 x 450 transparent
Effects
– Plugins – Flaming Pear - Glitterato

Copy
& paste the Tie-Fighter as new layer
Duplicate
it 2 times (Layers – Duplicate)
Merge
these 3 layers
Layers – Merge – Merge Down, again Merge Down

Duplicate
the layer 8 times, total 9 layers
Rename
these layers S1 to S9
Add
a vector layer at the top
Layers
– New Vector layer
With
Pen Tool draw a line for adjustment
With
Move tool place the Tie Fighters
A
little left in each layer
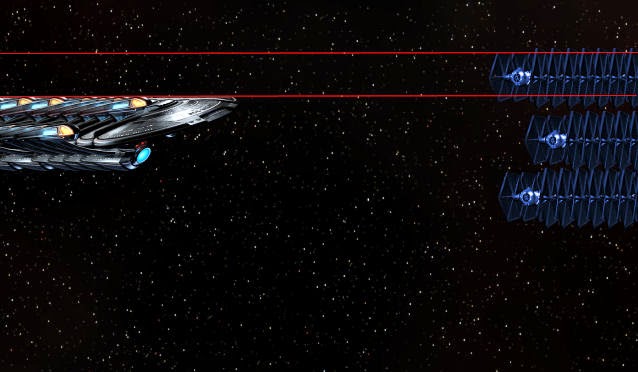
Place them like this


Copy
& paste the Tie-Fighters in Animation Shop
Effects
– Insert Image Transition – Saturation Wipe
Use This Settings
You
will get 33 frames
Select
frame no. 23. Edit - Copy
Back
to PSP. Paste as new layer above S9
With
Move Tool place it above previous Tie-Fighter
Try
to place as accurate as possible
Like
this copy & paste frame 24 & 25
Rename
these layers S10, S11 & S12
Layers
– New Vector layer
Foreground
color #0000FF
Use
Pen Tool draw 3 lines, with this setting
Draw
like this
Right
click on layer – Convert to Raster Layer
Duplicate
the layer 10 times, total 11 layers
Rename
these layers L1 to L11
Pick
Eraser Tool, select L1 layer
Erase
all dashes except first 3 dashes
Select
L2 layer; Erase all dashes except second 3 dashes
Like
this remove dashes from L3 to L11
keeping
only 1 set of dashes
Copy
& paste the Spaceship1 as new layer
Duplicate
8 times. Rename these layers U1 to U9
With
Move Tool place it a little right in each layer
Layer
– New Vector Layer
Foreground
color #00FFFF
With Pen Tool draw 3 lines
Right
click on layer – Convert to Raster Layer
Rename
this layer I1
Copy
& paste Spaceship2 as new layer
Duplicate
15 times. Rename these layers M1 to M16
With
Move Tool place it a little left in each layer
Layer
– New Vector Layer
With Pen Tool draw a line
Right
click on layer – Convert to Raster Layer
Rename
this layer I2
Select
M1 layer. Duplicate another 8 times
Rename
these layers A1 to A8
Select A1 layer. Image – Rotate – Free Rotate –
Right 5
Like
this add 5 in each layer
A2=10, A3=15 … A8=40
Layer
– New Vector Layer
Foreground
color #FF0000
With
Pen Tool draw 2 lines
Right
click on layer – Convert to Raster Layer
Rename
this layer R1
Copy
& paste Spaceship2 several times again
With Move Tool place them like this
Copy
& paste the Spaceship1 in Animation Shop
Effects
– Insert Image Transition – Dissolve
Use This Settings
You
will get 32 frames
Edit
– Select All. Minimize & keep it in Animation Shop
We
are done.
Now
animation
Delete
vector layers (the red lines)
Keep
the sky layer open, close all other layers
Open
S1 layer, Edit – Copy merged
Paste
in Animation Shop as new animation
Close
S1 open S2, then S3. Edit – Copy Merged
In
AS paste after current frame
Open
S4 & U1. Do like this S5 & U2 … S9 & U6
Keep
S9 open. Open U7, U8 & U9 one by one
Keep
S9 & U9 open, open L1 to L11 one by one
Repeat
this step once more
Now
I am showing you the combination of layers
which
you should open at a time
S9,U9,
I1 – S9,U9 – S9,U9, I1 – S9,U9 – S10, U9 –
S11,U9
– S12,U9 – U9 – U9 then M1 to M16
U9,M16,
I2 – U9,M16 - U9,M16, I2 – U9,M16 - U9,M16, I2 – U9,M16
U9,
A1 to A8 – U9, A8 R1 – U9, A8 - U9, A8 R1 – U9, A8
Now
the tricky part
Add
another frame U9, A8 say the frame is X
Paste
another frame only A8
Duplicate
this frame 30 times, total 31 frames
So X
+ 31 Frames total 32 frames
Press
ctrl and select these 32 frames
Open
the animation we have minimized earlier
Edit
– Copy, then again minimize
Edit – Paste – Into Selected Frame
Bring
the mouse over frame X, you can see
The spaceship1 in your mouse tip
Place
it carefully above spaceship1
You
can see it in all 32 frames
Open
and close A8 to A1
Then
the remaining Spaceship2 one by one
This
is just an idea
You
don’t have to follow me line by line
Play
with layers. Open & close in different combinations
There
is no Right and Wrong
You will get only different animation
No comments:
Post a Comment