
Seal

Materials


In
this tutorial, along with animation
You
will learn how to create attractive background
Open
a document 670 x 400 transparent
Paint
with color # F5E7CA. Rename the layer Pool
Layers
– New Raster Layer
Paint
with color # 87BAFF. Rename the layer water
Stand
on water layer
Effects – Plugins – Flaming Pear – Flood

With
raster Deform Tool make the layer like this
(Use
scale & free both)

Stand
on Pool layer
Like
previous make the layer like this

Layers
– New Raster Layer
With
rectangle selection tool draw 3 rectangles
on 3
top sides of the pool
Press
Shift for multiple selections
Fill
with color # 808080
Then reduce the opacity to 50%


Layers
– New Raster Layer
Arrange
– Send to Bottom
Copy
& paste the Grass as new layer
Do
not enlarge it. Copy & paste multiple times
Merge
these layers ( Merge Down )

Copy
& Paste the Bush above this layer
Duplicate
& resize 95% and place
Do
this another 3 times & both sides of the pool

Copy
& paste the house as new layer & place it
Add
a new raster layer above the Bush layers
but
below the House layer
With
rectangle selection tool draw a selection

Selection
– Modify – Expand 5
Fill
with color # 93634D
Effects
– texture Effects – Texture

You
will get this
Rename
this layer wall

Copy
& paste the tree as new layer below the wall layer
Stand
in the pool layer
Selections
– Select All
Selections
- Float
Effects
– Plugins – MuRa’s Seamless – Checks

Adjust
– Sharpness – Sharpen More
Again,
Adjust – Sharpness – Sharpen More

We
have done the background
Now
prepare the animation
Copy
& paste the Seal as new layer at the top. Place it

Layers
– Duplicate, Image – Mirror

Copy
& paste 2 balls in 2 different layers

Layers
– New Vector Layer
With
Pen Tool draw 2 lines like the picture below
Add
another vector layer
Keep
your foreground color open
and
close the background color
With
Ellipse Shape Tool draw an ellipse

Stand
on Ball 1, Duplicate several times
Image
– Rotate – Fee Rotate – Right 20

Next
layer rotate 40
Like
this add 20 in each layer up to 340
20,
40, 60 …. 320, 340
Add
the ball in another 5 layers
With
Move Tool place like this

Do
the same for Ball 2
Copy
& paste Ball 1 several times again
With
Move Tool place like this

Copy
& paste Ball 2 several times again
With
Move Tool place like this
You
have to do the whole thing again
But
with the different ball now
Because the balls have interchanged now

Close
the balls & vector layers
Stand
on the layer Seal 1 (Right side)
Layers
– Duplicate
In
this layer select the head

Right
click in the selection – Copy
Right
click in the blank space in PSP – Paste as new image
Minimize it. Hit Delete in keyboard

Selections
– Select None
Do
same to Seal 2 (Left side)
Now
you have two Heads & two seals without head

Copy
& past each head as new layer
Place
those above headless seal
With
Raster Deform Tool rotate a little like the picture

Stand
on headless seal 1 layer
Select
Clone Tool
Right
click on the body then left click in the gap & fill it

Layers
– Merge Down (Head & headless body)
Do
the same to Seal 2

Delete
the Vector Layers
We
are done
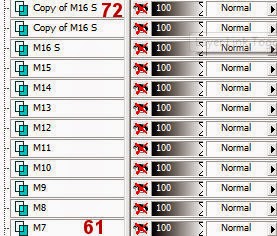
Layers
positions


Now
animation
Keep
the background open all the time
Open
Seal 1, Seal 2, Ball 1 & Ball 2
Then
open the rotation of ball 1 & 2
Both
balls at the same time
Bottom
to top then close the layers
Top
to bottom one by one
In
each move, go to
Edit
– Copy Merged, go to Animation Shop
Paste
After Current Frame
Open
the upward movement of balls
Bottom
to top then close from top to bottom
Open
the movement of balls
Both
ball at the same time
After
that do the same thing again
with
different ball
When
the Seals throw the balls
Close
Seal 1 & Seal 2 layers
and
open Copy of Seal 1 & Seal 2
(
The merged copy)
When
the Seals receiving the balls
Close
the Copy of Seal 1 & Seal 2
Open
again Seal 1 & Seal 2
If
you face any problem
send
me an e-mail, I shall clarify
No comments:
Post a Comment