
Zig Zag

Open
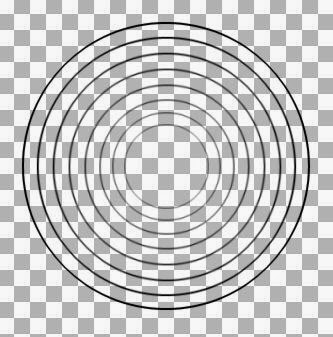
a document in PSP 400 x 400 transparent
Selection
– Circle – Draw a circle
Fill
with black
Selections
– Modify – Contact 2
Hit delete – Selection None

Layers
– Duplicate
Image
resize 90%
Layer
duplicate & resize another 6 times
Resize 88, 86, 84, 82, 80, 78%
Select
Pen Tool & draw 2 lines
in
the middle for adjustment

Duplicate
first layer (outer ring)
Layers
– Arrange – Bring to top
Place it like this with Move Tool

With
Eraser remove excess portion

Duplicate several
times & place like this

Again
duplicate 8 times & place
To differentiate
this 8 curves
Erase
some portion of curve

These
layers are just indicators
Nothing
to do with actual animation
We
shall work on these layers
Add 16
Blank layers at the top
Rename
A1 to A16 (bottom to top)
Stand
on A1 layer
Brush
- Twirly Star – Size 25 – Color Red

Click
once at this points

Stand
on A2 layer
Click just next curve

Do
like this in A3 to A8
When
you reach the fifth circle from centre
Change
the color of first circle to yellow
Layer A5
Layer A5

When
the yellow reach the fifth circle from centre
Change the color of first circle to green
Layer A9
Layer A9

When
the green reach the fifth circle from centre
Change
the color of first circle to red
Layer A13
Layer A13
This
is the basic
Add
some brush in other places
in
this sequence. Use your imagination
I
used Star Points below Twirly Star
in
every layer
Now
select Round flower brush

Stand
on A1, size 20, color blue
A2 –
size 30, A3 – size 40, A4 – size 50

Like
this A5 to A8, color red
A9
to A12, color yellow
A13
to A16, color green
Close
all layers, open A1
Close
A1, open A2
Like
this up to A16
Each
time Edit – Copy Merged
Paste
to Animation Shop
After
Current Frame
Timing
automatic (10)
I
added a layer at the bottom
Painted
with black
If
you want transparent
Don’t do this step
For Transparent don't use light color
like yellow
Use dark color like blue
For Transparent don't use light color
like yellow
Use dark color like blue
No comments:
Post a Comment