
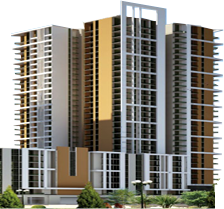
Towering Inferno

Materials


Open
a document in Paintshop pro 670 x 450 transparent
Paint
with color #79A2DF. Rename the layer Sky
Copy
and paste the buildings as new layers
Pick
Freehand Selection Tool – Point to Point
Select
a portion like this as pavement
Fill with color #808080
With
Raster Deform Tool – Free Mode
Adjust the right side building, according to
pavement
Crop
some grass from any picture
Stand
on Sky layer
Copy
and paste the grass as new layer
Stand
on Pavement layer & click in the blue portion
to select like this
Stand
on Grass layer
Layers
– New Raster Layer
Paint
with color #2D2B2B
Selections
– Select None
Duplicate
the multistoried building 9 times
Rename
the layers A1, A2….. A7, A8 & A9
Stand
on A1 layer, close A2 to A5 layers
Select
the window of a floor
with
Freehand Selection Tool

Effects
– Plugins – Eye Candy 3.1 – Smoke
Use this setting
Effects – Plugins – Eye Candy 4000 – Fire
Use this setting

Keep the selection
Stand
on the layer A2
Effects
– Plugins – Eye Candy 3.1 – Smoke
Change
the Random Seed to 2
Do
not touch anything else
Effects
– Plugins – Eye Candy 4000 – Fire
Click
on Random Seed once
Do
not touch anything else
Like
this stand on A3 and change Random Seed
Now
stand on A4 layer, close A5 & A6
Press Shift on keyboard and select these
Use
the same Plugins
Just change the value shown with red circle

Apply
this in the layers A5 & A6
Like
previous change the Random Seed
In
the layers A7, A8 & A9
Use
Eye Candy 3.1 Smoke only, with previous setting
Stand
in the top layer
Copy
& paste the Fire Engine several times as new layers
With
Move Tool arrange like this
Rename these layers FB 3 (each layer)
Close
these layers
Copy
& paste the truck with ladder several times as new layers
With Move Tool arrange like this
Rename
these layers FB 1 (each layer)
Open
the truck with ladder
Image
– Mirror
Copy
& paste several times as new layers
With Move Tool arrange like this
Rename
these layers FB 2 (each layer)
Close
these layers, open top layer of FB 3
Copy
& paste the twin fireman as new layer
Below
the 1st FB 3 layer few times
With
Move Tool arrange like this
Move them towards left a little in each layer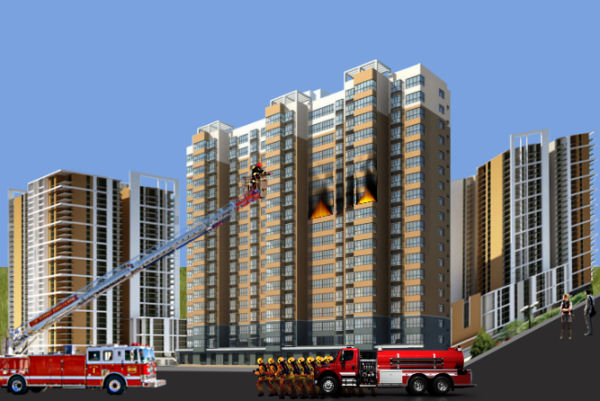
Copy
& paste the single fireman as new layer few times
You can
use as many firemen as you like
Move them a little upward in each layer
Stand
in the top layer
Layers
– New Raster Layer
With Rectangle Selection Tool draw a selection
like this
Paint
with color #E6F4F4
Selections
– Select None
Adjust – Blur – Gaussian Blur 1.00
With
Raster Deform Tool rotate and place like this
Erase the excess portion if required
Layers – Duplicate, Image - Mirror
With Raster Deform Tool rotate and place like this

We
are done
Now animation
Close
all layers except
Buildings,
Road, Grass & Pavement
Open
A1
Edit
– Copy Merged
Paste
in the Animation Shop As New Animation
Then
close A1, open A2 then A3
Edit
– Copy Merged
Paste
in the Animation Shop After Current Frame
You
have to continue this process
A1,
A2 & A3
Open
& close FB3 one by one
At the
last layer of FB3 Close A1, A2 & A3
Open
A4 then A5 then A6
You
have to continue this process
A4,
A5 & A6
Open
& close the firemen
Open
& close FB1 & FB2
At the
last layer of FB1 open the 1st water jet
At the
last layer of FB2 open the 2nd water jet
Remember
you have to continue A3, A4 & A5 all the time
After
some time close A4, A5 & A6
Open
A7 the A8 then A9
Then
close A7, A8 & A9
Also
close water jets
que original!!!!!
ReplyDelete