
Rocket Launching

Materials


Foreground
color #000000
Background
color # 3899FC
Make
a Foreground-background gradient
Angle & Repeat 0, invert checked
Open
a transparent document in PSP 540 x 900
Paint
with the gradient. Minimize it
Open
another transparent document in PSP 540 x 900
Effects – Plug-in – Flaming Pear – Glitterato
If
you do not have Glitterato, use night sky color
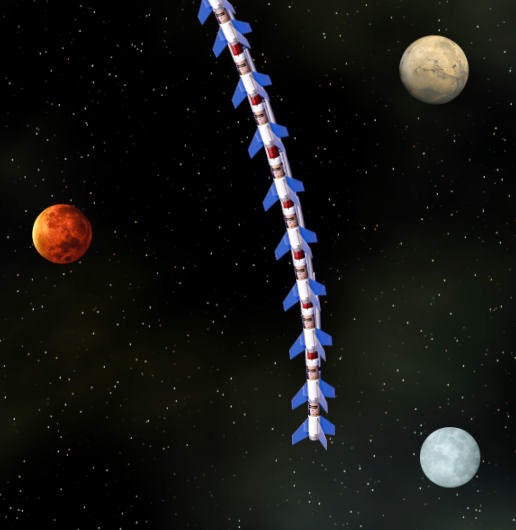
Place
the planets as new layers like this
Merge
visible

Open
a new document 540 x 1800
Paste
the previous two documents as new layer
Like this

Use eraser
in the joint. Merge visible.
Rename
it sky
Minimize
it. We don’t required previous
two
documents any more
Open
a new document 520 x 700
We
shall work in this document
Copy
& paste sky as new layer
Use
some grass & trees as background
With
pen tool draw a launching pad

Copy
& paste the rocket as new layer

Copy
& paste the rocket another 12 layers
With
move tool place those little upwards in each layer
Zoom
the whole thing for perfection
Rename these layers R1 to R13

Copy
the sky ( which we have minimized earlier )
Paste
as new layer below R1
With
move tool draw little downward
Lower
the opacity to 40 for adjustment
After
placing the layer, back to opacity 100

Like
this paste sky as new layer several times,
this
is still in your mouse
and draw
each layer a little downward.
Use
View – Ruler, for uniform gap
Rename
these layers S1, S2, S3 ….
I
have done up to S33
When
you reach at the end point, can’t move
the
sky down anymore

Copy
& paste rocket several times above R13
Rename
these layers F1, F2 ….
Stand on F1. Image – Rotate – Free Rotate 4 left

Move
little upward
Like
this in each layers ( F2, F3 … )
Add
4. Such as 4,8,12,16,20 ….
and
move upward
Now
close all layers
Open
S1 & R1. Stand on R1 layer
Effects
– Plug-in – Eye Candy 4000 – Fire

Do
not change Direction, circled with red
You
can change other settings if you like
Keep
S1 open and do this to each layer
R2
to R13 but click Random Seed
Once
in each layer
In
each layer go to Edit – Copy Merged
and
paste in Animation Shop
when you reached R13, click undo in PSP

Keep
R13 selected, open one by one
S2,
S3 ….S33
Each
time use Eye Candy 4000 Fire
But
click on Random Seed, then after pasting on
Animation
Shop, click undo
When
you reach S33, keep selected the layer
Now
use Fire in F1, F2 …
But this time change Direction by adding 4 in
each layer

Like
274, 278, 282 …
Do
not forget to click Random Seed each time
In
Animation shop, timing by default 10
Hope
I have not messed the tutorial
If
you have any problem in understanding
Send
me a mail in any language
abhijit2011b@gmail.com
I shall clarify that to you
No comments:
Post a Comment